Are you looking for more Christmas crafts for kids?
Take a look at our:
- Santa salt dough handprint ornament,
- snowman fingerprint snowman ornaments
- photo salt dough ornaments.
We have an ever growing collection of salt dough ornaments that the kids have made over the years. Personalised Christmas ornaments are the best!
As well as lots of salt dough ornaments to browse through we also have a few wood slice fingerprint ornaments, they always look beautiful hanging on the Christmas tree. It is lovely to see the handmade ornaments evolve each year as the children get older and their interests change.
Why not make a fingerprint Christmas tree card to go with your fingerprint salt dough ornament!
Our Latest Videos
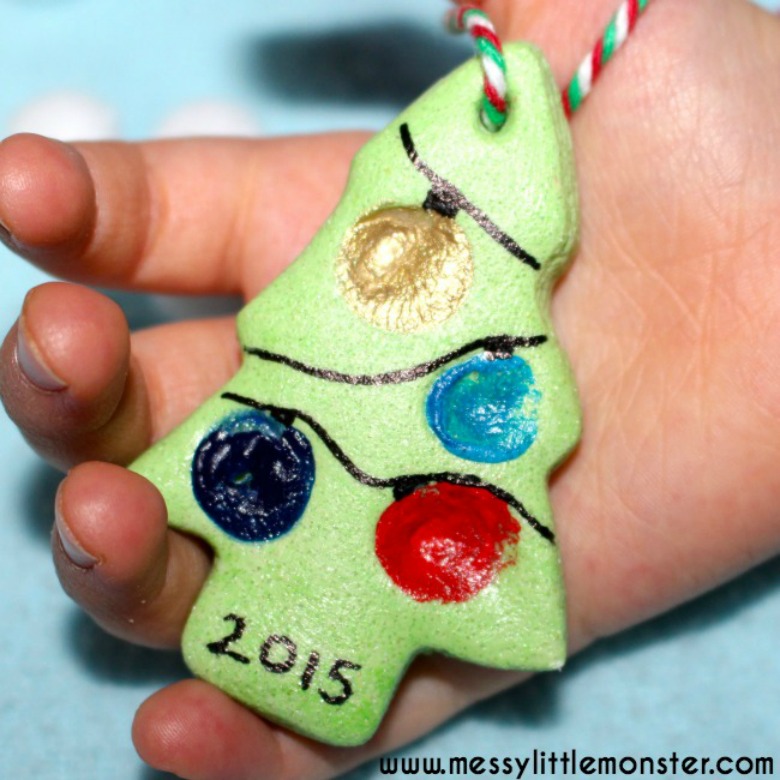
These salt dough fingerprint Christmas ornaments are easy to make (watch the video below to see just how easy), look great on the Christmas tree and make beautiful keepsakes to treasure!
If you love handmade keepsakes as much as we do take a look at our collection of keepsake craft ideas for kids. There are lots of really cute ideas!
These fingerprint Christmas tree ornaments made from salt dough are the perfect size to hang on the Christmas tree. They aren't too heavy so they hang perfectly without weighing the branches down. The best bit about this fingerprint ornament is that older toddlers and preschoolers can do it themselves without too much adult input.
I've supplied links to Amazon for easy purchasing! Just click the links below to be taken to the product pages. As an Amazon Associate if you use the links I will earn from qualifying purchases at no extra cost to you. Thank you for supporting our work.
If you have any salt dough left after making your fingerprint salt dough ornaments have a go at making a couple of salt dough crafts like our salt dough handprint bowl, salt dough fingerprint magnets or salt dough handprint frame.
Alternatively click here and scroll to see all our salt dough crafts.
Watch our video instructions
Before you can begin making your salt dough ornament you will need to follow our salt dough ornament recipe to mix up some coloured salt dough. Take a look at our full salt dough recipe for tips and tricks on how to make the best salt dough.
To make salt dough for these salt dough ornaments simply mix the flour and salt together in a bowl and then slowly add the water. If your salt dough is too sticky just add more flour. To make the salt dough coloured at green food colouring or paint to the water before mixing it with the dry ingredients.
If you love handmade keepsakes as much as we do take a look at our collection of keepsake craft ideas for kids. There are lots of really cute ideas!
These fingerprint Christmas tree ornaments made from salt dough are the perfect size to hang on the Christmas tree. They aren't too heavy so they hang perfectly without weighing the branches down. The best bit about this fingerprint ornament is that older toddlers and preschoolers can do it themselves without too much adult input.
Fingerprint Christmas Tree - Salt Dough Ornament Recipe
Supplies for salt dough ornaments
- Coloured salt dough (follow our salt dough recipe and add green food colouring or paint)
- Christmas tree cookie cutter
- Acrylic paint
- Mod Podge all in one glue and sealer
- Black sharpie
- Bakers Twine
See our recommended salt dough supplies
If you have any salt dough left after making your fingerprint salt dough ornaments have a go at making a couple of salt dough crafts like our salt dough handprint bowl, salt dough fingerprint magnets or salt dough handprint frame.
Alternatively click here and scroll to see all our salt dough crafts.
Watch our video instructions
How to make a fingerprint salt dough ornament - Fingerprint Christmas Tree
Ingredients for the salt dough ornaments recipe
- Plain flour or all-purpose flour (2 cups)
- Salt (1 cup)
- Water (up to 1 cup)
Salt Dough Ornament Recipe
To make salt dough for these salt dough ornaments simply mix the flour and salt together in a bowl and then slowly add the water. If your salt dough is too sticky just add more flour. To make the salt dough coloured at green food colouring or paint to the water before mixing it with the dry ingredients.
TIP: Add lots of colouring when making coloured salt dough as the salt dough fades a bit once dry.
For tips on baking salt dough, sealing salt dough, varnishing salt dough and storing salt dough take a look at our full post on how to make salt dough.
For tips on baking salt dough, sealing salt dough, varnishing salt dough and storing salt dough take a look at our full post on how to make salt dough.
How to make a fingerprint Christmas tree salt dough ornament
STEP 1: Prepare your salt dough
Follow the easy salt dough ornament recipe above to make a batch of green salt dough. Make sure the colour is mixed in well and then roll your salt dough flat. The salt dough needs to be about 1cm thick.
STEP 2: Make a salt dough Christmas tree shape
Use a Christmas tree shaped cookie cutter to cut out salt Christmas tree shapes. Toddlers and preschoolers will love making their own Christmas tree shapes ornaments by pressing the cutter into salt dough. they may just need a little help to make sure they have pressed the cookie cutter down hard enough.
Make a small hole at the top of each christmas tree (for hanging). We use a straw or skewer to make a hole.
STEP 3: Add fingerprint baubles or fingerprint Christmas lights
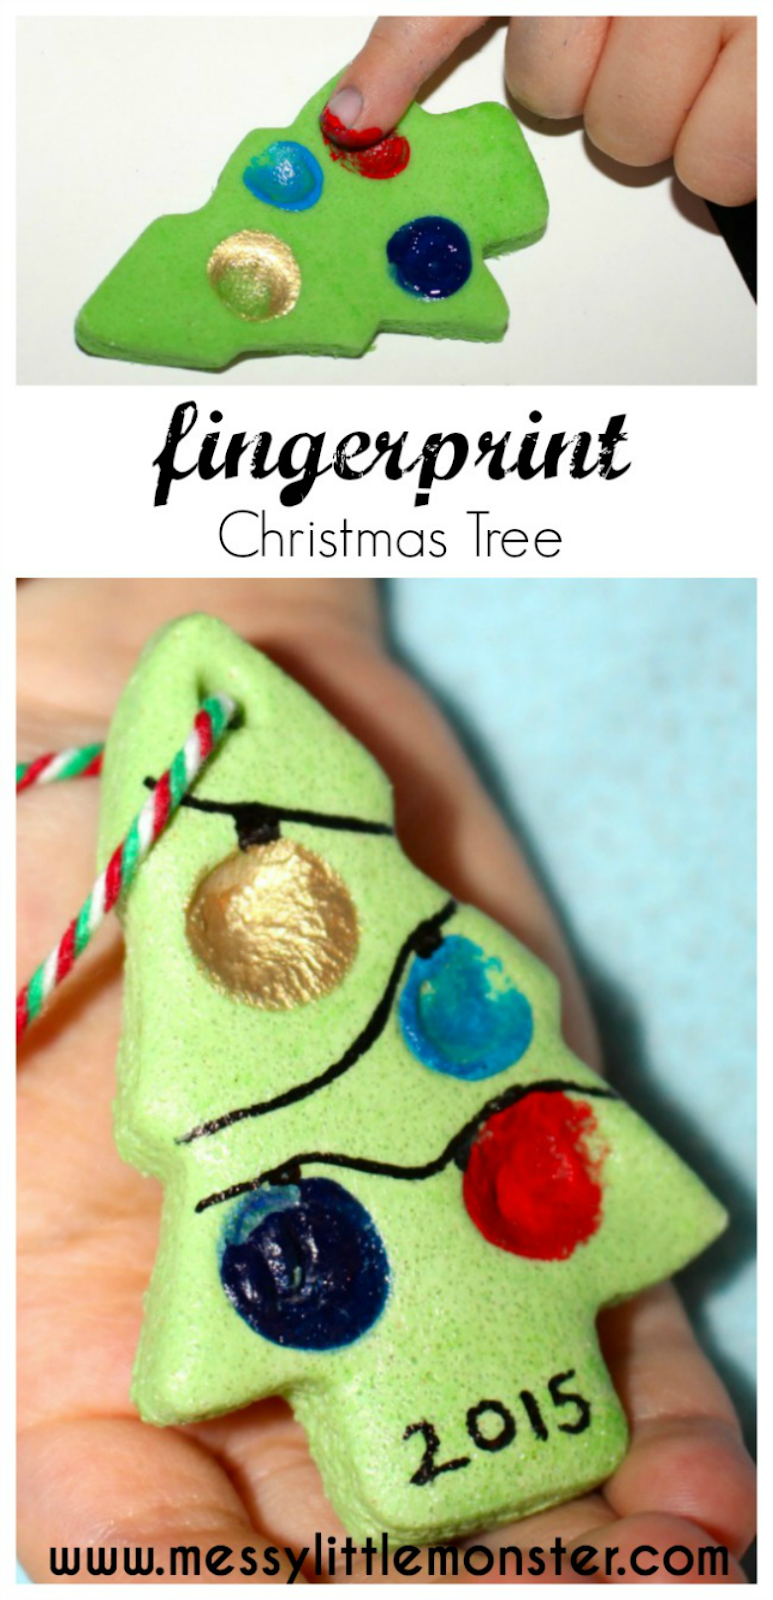
Dip your child's finger into acrylic paint and press it onto the salt dough (see image below) to create the baubles or Christmas tree lights. You can use a whole selection of paint colours or sometimes it can look nice if you limit it to two or three colours.
For babies and younger toddlers you may have to guide their finger onto the salt dough ornament but older toddlers and preschoolers will love doing this independently.
STEP 4: Bake salt dough
Bake your salt dough at a low temperature for 2-3 hours. Turn the salt dough over half way through to help speed up the drying out process. (See our easy salt dough recipe for more details)
Your salt dough decorations need to be fully dried out before you move onto the next step. If you are not able to bake your decorations you can leave them to dry out in a warm room or dry them out in the microwave.
STEP 5: Seal the fingerprint salt dough ornaments
Seal the fingerprint Christmas trees with mod podge or a finishing spray. This is a really important step if you want to keep your salt dough ornaments forever. You must prevent any moisture from being able to get into the salt dough or it will go soggy.
STEP 6: Add details
STEP 7: Add thread, ribbon or twine
Add some thread or ribbon through the hole at the top of your fingerprint Christmas tree and your salt dough ornament is complete.
We love using red, green and white bakers twine to hang our Christmas ornaments as it gives the ornaments a lovely christmassy finish.
Click here for our easy salt dough recipe and tips on colouring salt dough, sealing salt dough and storing salt dough crafts.
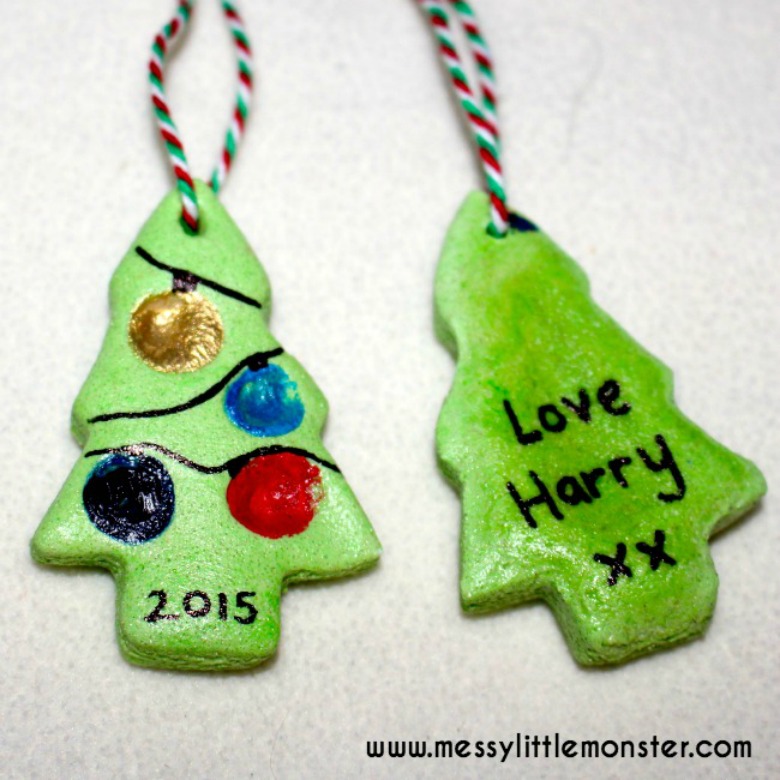
You might want to use a sharpie to add a message on the back of each salt dough fingerprint ornament. These personalized Christmas ornaments make beautiful homemade keepsakes that can be brought out year after year.
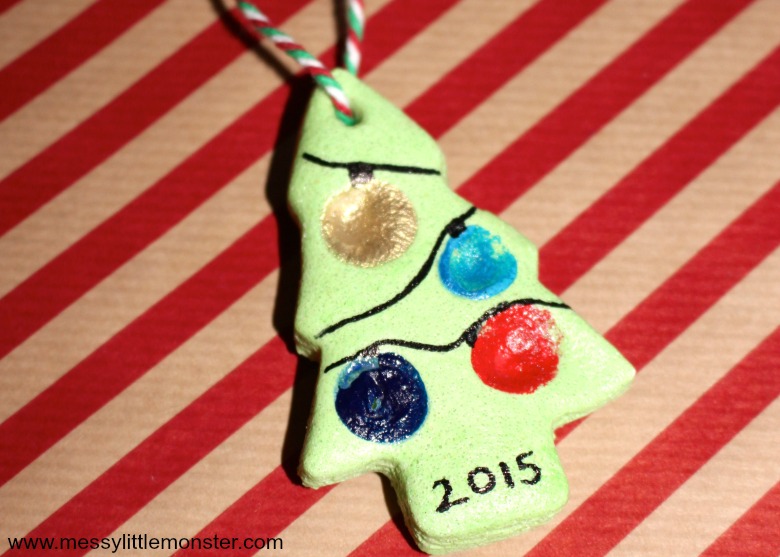
These salt dough ornaments look great hanging on the Christmas tree but you can also use these fingerprint Christmas trees as gift tags for Christmas presents for family or friends.
We hope that you have fun making your own fingerprint Christmas tree using our easy salt dough ornament recipe. These salt dough fingerprint ornaments are such a fun and easy Christmas craft for babies, toddlers and preschoolers. Salt dough ornaments like these fingerprint ornaments are the BEST!
If you like these fingerprint Christmas tree ornaments you will love all our other salt dough ornaments


Does it matter if use mod podge before or after you use the sharpie?
ReplyDeleteI use mod podge first as it gives you a smoother surface to draw on.
DeleteHow long do you bake it in the oven?
ReplyDeleteThe basic salt dough recipe says air dry or put in an oven at about 150 degrees for a couple of hours.
DeleteKeep away from pets
ReplyDeleteYes, they are dangerous to pets
DeleteHi Kaye - if planning a craft party, how far in advance can I make the dough without it drying out or how would you recommend storing the dough until the party? Thanks!
ReplyDeleteIt is best to make it as close to the party as you can but it might store ok for a short time if left in an air tight container. I haven't tried making it in advance though and I know if you leave it out it starts drying out quite quickly.
DeleteHow many ornaments does this recipe make?
ReplyDeleteIt will make quite a few. I usually use mugs as a measure and it makes enough to make several different ornaments.
DeleteWould it be possible to use Fimo or another acrylic polymer dough instead of salt dough? Do you think it would work as well?
ReplyDeleteIt would be worth a try. We made fingerprint keyring using fimo (http://www.messylittlemonster.com/2014/12/fingerprint-heart-keyring-ornament.html) but we used ink for the fingerprints not paint so I couldn't say if paint would work. Let me know how you get on.
Deletemmmmm now you have me thinking! I wouldn't have thought the sharpie would wear off as its permanent? I did the mod podge first so I had a smooth surface to draw on as when i have tried to draw straight onto salt dough in the past it has looked a bit bumpy.
ReplyDeleteHi, I made these Christmas trees today however the green colour of the dough had faded significantly in the oven... Is this common or have I done something wrong?
ReplyDeleteYes it does fade. To get the colour in these pictures I added quite a lot of colouring. When you seal the salt dough it does brighten up a little.
DeleteSo do you bake these first and then seal them once dried????
ReplyDeleteThats right, yes. Have fun.
DeleteCould I have the same result if I used the baking soda and cornstarch recipe? I love this idea, just wanting something that is lightweight.
ReplyDeleteI would have thought so but i haven't tried it. Let me know how you get on.
DeleteDo you have to use mode podge? Or is it just to make it shiny?
ReplyDeleteYou need to seal the salt dough in some way if you want to keep your decorations for a long time. You could use a spray but I find mod podge the easiest. I have heard others say they have used normal white glue to seal their creations (but I couldn't say how well this works). If moisture gets into the salt dough it ruins it.
DeleteDo you have to use mod podge?
ReplyDeleteYou need to seal the salt dough in some way if you want to keep your decorations for a long time. You could use a spray but I find mod podge the easiest. I have heard others say they have used normal white glue to seal their creations (but I couldn't say how well this works). If moisture gets into the salt dough it ruins it.
DeleteMod Podge before AND after sharpie and you'll have your bases covered!!
ReplyDelete:-)
DeleteIf I'm doing this in my classroom with 19 students, would you recommend doubling or tripling the recipe? Thank you!
ReplyDeleteSorry, I didn’t see this comment. I hope you had fun making them
DeleteI am making these this year and am curious about whether you doubled or tripled your recipe because I have 18 students.
DeleteI sealed these with mod podge after about 2-3 hours in the oven... after sealing they don't feel as dried out as expected... should I put them in the oven again or just leave them out a few days?
ReplyDeleteYou need to make sure they are completely dried out before you seal them. I'm not sure what will happen if you try to put them back in the often after sealing them. It's worth a try though.
DeleteThink you could you use tempera paint for the finger prints rather than acrylic? Especially because you are sealing with Mod Podge?
ReplyDeleteSorry I don’t see this comment, acrylic is better. I hope they worked out well for you.
DeleteHow many days do you have to allow them to dry,if you are not putting in oven.?
ReplyDeleteSorry I didn’t see this comment, I hope they worked out ok for you. Oven is better but if you can’t use an oven 2/3 days in a warm room should do it.
DeleteHello! These are so cute. I have thought about making these for a church activity. We would need about 30. How many does one batch make?
ReplyDeleteAlso, we would make these early in the morning. If we made the trees the night before would the kids still be able to do the fingerprints in the morning? Or would they be too dry? Thanks!!
I’d make up a couple of batches and have some spare ingredients so you can mix up more if need be. You don’t need that much salt dough for each one, but you wouldn’t want to run out! I wouldn’t make the trees in advance as they start drying out quickly, and the kids will love cutting their own.
DeleteWould finger paint work instead of acrylic?
ReplyDeleteI am not sure. It might work ok but I haven’t tried it. Let us know how you get on.
DeleteI flipped the ornaments over in the oven but the backs seem to not be drying or hardening. Any suggestions?
ReplyDelete