Handprint flowers make for a fun craft on rainy days, Mother's Day, or even Teacher Appreciation Day. Toddlers, preschoolers, and even older kids will love making this handprint flower bouquet craft! Follow the step-by-step directions below to make your very own.
Check out some of our other fun flower crafts:
Flower crafts are always so much fun to create with toddlers and preschoolers. We really loved this handprint flower craft, and it's such a great keepsake craft, despite how simple it is. It's perfect for playdates, after-school activities, and much more.
I really love that, depending on the child, each one can look completely different. They might choose different colours for the handprint flowers, or opt to add additional materials. There are so many ways to really have fun with this handprint flower craft!
Scroll down to get started making your very own handprint bouquet!
Handprint Flower Bouquet
Why You'll Love This Handprint Bouquet
This handprint flower bouquet is such a cute idea for kids to create! If you're not convinced, here are just a few reasons you'll love this handprint bouquet:
- KEEPSAKE: Since this craft involves your child's handprint, it makes a great keepsake craft. You can save it to look back on years from now!
- SIMPLE: The supplies needed aren't anything fancy, and you likely have most, if not all, lying around already.
- SKILL PRACTICE: This is a great craft for practicing fine motor skills like cutting, tracing, tying, and more.
Handprint Flowers Supplies:
- Cardstock papers - green, brown, red, pink, purple
- Bakers twine
- Black marker
- Scissors
- Glue stick
How to Make This Handprint Flower Craft
STEP 1: Gather your supplies
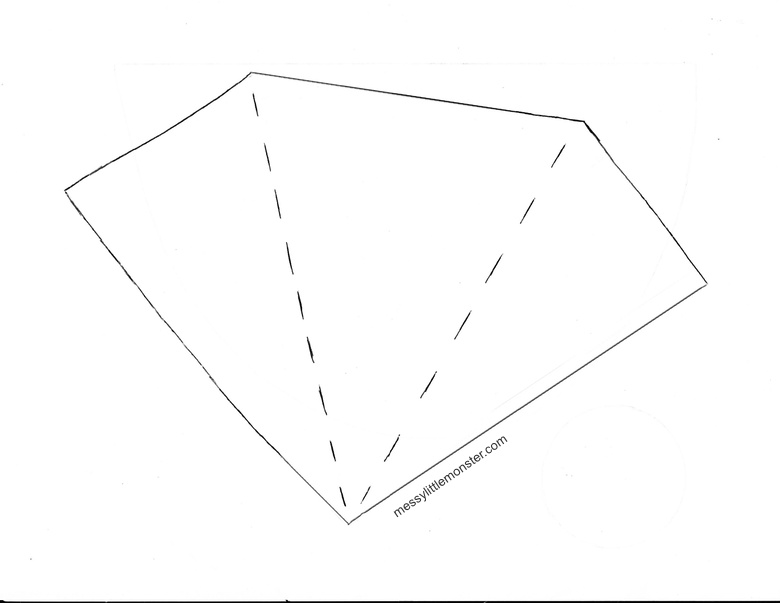
Before you get started, be sure to have everything you need to hand to make things easier. You'll also need to print the template for the flower wrapper, so be sure to do that before you get started.
STEP 2: Prepare the template
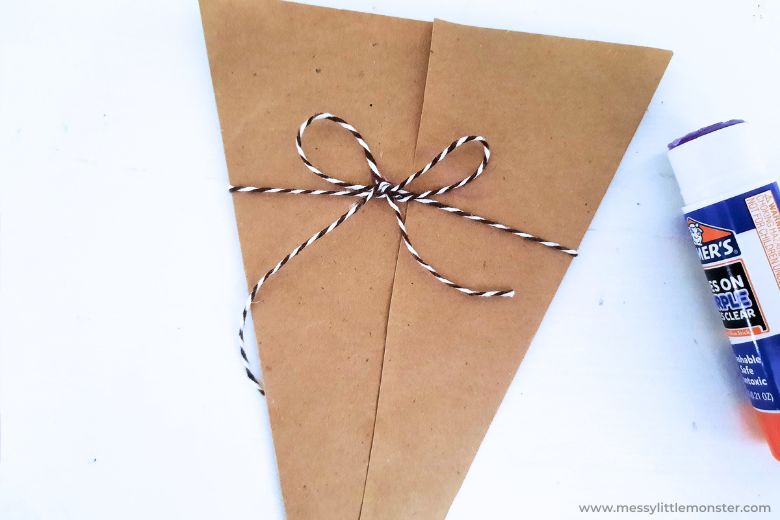
Now, to get started, trace the wrapper template onto your brown cardstock paper. Then, cut it out and fold along the dotted lines. From there, you'll glue the folds together until you have what looks like a bouquet.
Be careful not to glue the wrapper closed, as we want an opening for the handprint flowers.
STEP 3: Add the twine
Next, cut a strand of baker's twine that's long enough to wrap around the handprint bouquet. Glue or tape the center of it to the back of the wrapper. Then, bring the ends together around the other side and tie them in a bow.
If preferred, you can glue the twine so it stays in place.
STEP 4: Create the handprint flowers
Now it's time to create a fun handprint! Trace your child's hand on the green cardstock and cut it out.
Once you've done that, use a black marker to draw some simple flowers on the other coloured papers. We used red, pink, and purple! Let your child have fun creating some cute flowers.
After you've finished drawing, cut them out and glue the flowers to the tips of the fingers on the handprint. You will need one flower for each finger on the handprint. Have fun experimenting with different colored and sized flowers.
STEP 5: Finalize the handprint bouquet
The last part is to insert the handprint flowers into the opening of the wrapper. Your handprint flower craft is now complete!
Handprint Flower Craft Variations
This handprint flower craft will be so much fun to do as is! But if you're looking for more ideas, here are some you can try:
- Paint a handprint and apply it to paper before cutting around it to attach the flowers to it
- Explore different colour combinations with the papers
- Invite children to decorate with different materials like tissue paper, glitter, or stickers!
- Add a message to the palm of the handprint for an added touch
- Create different flowers for different times of year such as heart-shaped flowers for Valentine's Day or autumn colours as we head into fall
To get this bouquet template for free, click on the link below and add $0. For personal or classroom use only. Not for redistribution. All images are copyrighted. Thank you.


.png)


No comments