This paper plate rainbow craft would be a great spring craft for kids. It can be hung by a window as a sun catcher or taken outside to be used as a kite. This fun rainbow craft is sure to brighten up your day!
If you or your kids love rainbow crafts then here are a few more fun ideas for you to check out:
Paper Plate Rainbow Suncatcher Craft
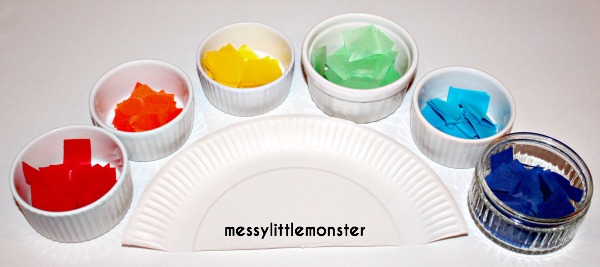
Rainbow Paper Plate Craft Supplies:
- Tissue paper (rainbow colors)
- Paper plate
- PVA glue (white glue) mixed with water (1:1 ratio)
- Scissors
How to make a paper plate suncatcher craft

To prepare for this rainbow craft, cut tissue paper in rainbow colors into small squares.
Then cut a paper plate in half.
Mix PVA glue (white glue) with water and then paint it onto the paper plate.
Once you have finished your tissue paper rainbow paint your glue mix on top of the tissue to keep all the pieces in place and then leave it to dry.
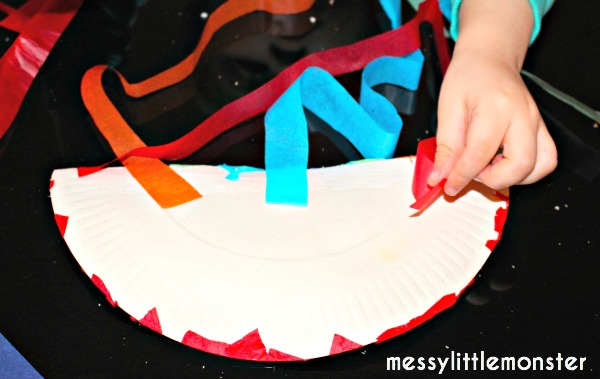
Whilst the paper plate rainbow is drying take your colored tissue paper and cut it into thin strips to hang from the bottom of the rainbow.
These tissue paper strips catch the light if you are making a decoration to hang in a window or look great trailing from the rainbow if you are making a kite.
Stick the strips of tissue to the back of the paper plate rainbow.
Punch a hole at the top of the paper plate rainbow and attach a ribbon.
Your paper plate rainbow suncatcher is now complete! Hang it in a window where it will catch the light or take it outside to have fun running around with it blowing in the wind.


Im glad you like them Nancy. I hope you have fun trying some things out with your kids.
ReplyDeleteWhat an adorable idea. We shall have to try that.
ReplyDeleteI saw something similar to this but using projector paper (clear) instead of the paper plate so the sun shines through. I plan on doing this with my Brownie troop this weekend.
ReplyDeleteI love that idea
Delete